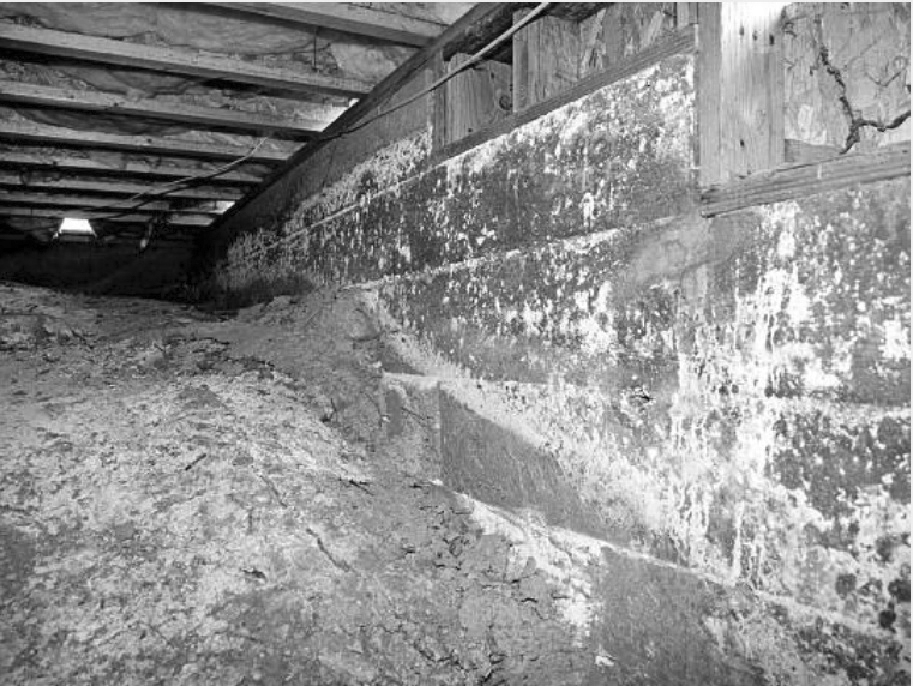
If you can detect a foul odor permeating through the home, it’s a frustrating and unpleasant experience. Even the cleanest home can have these problems, and it’s a sure sign that something is wrong. The source of the odor may be sewage in the crawl space, and this is a problem that needs to be taken care of in a timely fashion. It is possible to tackle a crawl space sewage problem yourself, or you can hire a local extraction and remediation service to do the work for you. If you are determined to deal with this problem yourself, here are ten steps that you need to follow in order.
How Does Sewage Get in the Crawl Space?
This is a common question; the most likely culprit is a broken sewer line located in the crawl space. The sewer outlet pipes in an older home can be prone to cracks, breaks, and leaks. If the sewer line is frozen in an under-insulated crawl space, it can release sewage after the line has thawed out. The city infrastructure can be a factor; an aging sewage city can cause backups which can damage vulnerable pipes. If you have trees in or in the vicinity of your yard, the tree roots can intrude on a leaking pipe and break it apart. If a water line leaks or breaks, it may release gray water, which is a breeding ground for bacteria and mold growth. The drain lines that run from the bathrooms and kitchen are also a possible source of contaminated water that could be lurking in the crawl space. As you can see, there are a lot of possible causes, and dealing with these underlying issues is important, or there will be a recurrence in the future.
10 Steps to Clean the Crawl Space Sewage
Before we begin, it’s important to stress that you need some personal protection gear to protect against the health hazards that come with a sewage leak. Wear wrap-around goggles, gloves, an OSHA-approved respirator, rubber work boots, and coveralls to protect your skin and eyes from these threats. If there are tears, replace the protective gear and clean it thoroughly after use or dispose of it safely.
Step 1: Put Down the Safety Barriers
When you work in a tight space, it’s likely that you will be crouching or lying down flat. So, it’s important to use safety barriers to limit contact between you and the sewage. Spreading tarps or thick plastic sheeting in the area as you clean and disinfect is advisable. The crawl space must be secured to prevent pets and children from getting inside. Any obviously damaged sewage pipes must be repaired before the removal of sewage, and the disinfection process can begin.
Step 2: Taking Breaks
It’s tempting to push ahead with no breaks to complete this unpleasant task quickly. But, the raw sewage odor should force you to take regular breaks, and you need a breather for five minutes every half hour. This is important because the organic pollutants present in raw sewage can cause health issues, such as headaches, nausea, burning eyes, and respiratory problems.
Step 3: Extract the Dirty Water
A submersible pump is required to extract the sewage and standing water from the floor. Any small spills can be removed with a wet/dry shop vac. But working with electrical equipment in tight and wet areas can be hazardous, and it’s important to work safely.
Step 4: Remove the Sewage
Some raw sewage will remain after the water is removed, and this should be shoveled into a plastic bag. A thin trash bag will tear, and heavy-duty plastic bags used for garden waste are a better option. The bags must be sealed and removed to a licensed solid waste disposal location.
Step 5: Drying Equipment
The plastic barriers can be removed, and it’s time to start the drying process. Set up dehumidifiers and fans that are designed to operate in wet and humid environments. It may take up to a week or longer to dry the crawl space completely.
Step 6: Stored Items
It’s safe to assume that any items stored in the crawl space are contaminated. Non-porous items can be disinfected with bleach and water, but porous items cannot be salvaged, and they should be sealed and thrown away.
Step 7: Clean Cuts and Wounds
If you have a small cut, scrape, or other wounds as you work, it’s important to treat it immediately. Leave the crawl space, disinfect the injury and cover it with a fresh waterproof bandage. Once you’re ready, return to the contaminated crawlspace and continue the work.
Step 8: Treat the Soil
The crawl space soil is probably contaminated with moisture and organic matter. The best approach is to spread lime on the surface of the soil and work it in to break down these contaminants. As an added bonus, the lime powder will deter insects and rodents under the home that may be attracted to the contaminants.
Step 9: Inspection and Reconstruction
When the area is dry and clean, it’s time to inspect the piers and joists for signs of rot and mold growth. The mold must be removed, and ventilation will be required to remove any remaining mold spores. Any damaged building materials must be removed and replaced.
Step 10: Call a Professional
Tackling DIY projects, maintenance, and cleaning tasks is a great way to save money. But, there are times when people regret their decision because they are overwhelmed by the scale of the task. So, it’s important to understand that you can call a professional plumber for help if you are struggling to clean the area and fix the underlying problems.
In Conclusion
Raw sewage is hazardous to health because it contains harmful bacteria and it can release toxic fumes. These conditions are an ideal breeding ground for mold, which degrades the indoor air quality (IAQ), triggering asthma and allergies. The liquid sewage and moisture can damage the crawl space materials that can compromise the structural integrity of your home.
If you are concerned about sewage removal and remediation for your crawl space, contact your local professional plumber today.


