If a plumbing pipe ruptures through a wall or ceiling, the water can travel to many other rooms in the home. The first step is to shut-off the water main valve to prevent more water from being added to existing water that’s been released into the home. In this article, we will show you how to dry water damage properly. Follow these eight simple steps in order to get your home back to normal quickly.
Step 1: Contact the Insurance Company
If you call your insurance company, they may recommend a local restoration contractor to deal with the water damage efficiently. The company needs to know about the leak immediately to ensure that they are in the loop and not forgotten. After you’ve made this call, you can start to deal with the water before it causes more damage.
Step 2: Mop Up the Standing Water
Remove as much of the standing water as you can with the mop to make it easier to work in the affected areas. Dry up any remaining water with some old towels to make the surfaces dry and to avoid slipping.
Step 3: Improve the Air Flow
It’s important to get fresh air flowing through the affected areas by opening the doors and windows. A slight breeze can help to dry out the floors, ceilings, and walls. Open any affected drawers, closets, and cabinets to get the air into those areas too. If it’s damp outside, wait until it’s dry to implement this step because damp air will not increase the drying times.
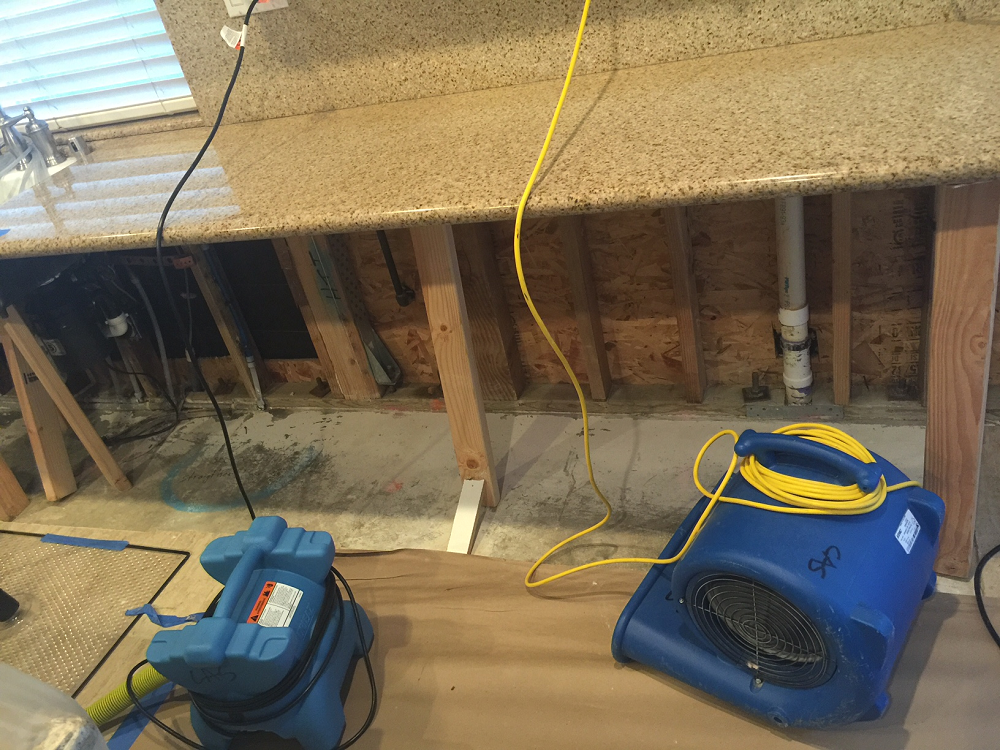
Step 4: Cross Ventilation
Place standing fans in opposite corners of the affected rooms to create cross ventilation currents that speed up the drying process. You can rent large fans for this job from many home improvement centers. If the water has damaged the HVAC system, don’t use it to boost the airflow until it’s been checked over by a professional technician.
Step 5: Dehumidification
If the drywall is soaked, you need to set up a dehumidifier, and if the damage is extensive, you may need multiple units.
Step 6: The Basement
Water damage will seep down into the basement if you have one, and it’s easy to overlook this area when you’re drying out your home. Check for dampness signs and dry out the concrete floors quickly to prevent mold growth. Increase the airflow with fans and run dehumidifiers in the basement as needed.
Step 7: Clean the Carpets
When the carpets are damp, they hold the water in close proximity to the floors, which can spread the water damage to subfloors and baseboards. A damp carpet is also an excellent breeding ground for mold growth too. The carpet needs to be cleaned to prevent this fungal growth, and then it should be finished with heavy-duty wet/dry vac. A wet rug or carpet cannot be cleaned with a standard vacuum cleaner.
Step 8: Move Things Outdoors
If the weather conditions are dry, it’s a good idea to move the wet furniture outdoors. The drying process is considerably faster when fresh air circulates around wet items. The sun will prevent the growth of mold on fabrics and wood surfaces. Don’t throw away damaged items until the insurance adjuster has inspected them.
In Conclusion
This sounds like a lot of hard work, and it is a challenge for most of us because we don’t have access to heavy-duty fans, dehumidifiers, and other equipment. The best option is to contact your local certified plumber and ask about their restoration and repair services.