There are few issues in the home that are more annoying and disruptive than a
plumbing leak. This is particularly true if it seems that the leak should be easy to fix yourself, yet it seems hard to stop and even reoccurs when you least expect it to. When a leak occurs, water is wasted, there is a mess to clean, and it can happen for a wide variety of reasons that may not be immediately obvious. Here are three simple steps that you can take to deal with an annoying under sink plumbing leak.
Step 1: Which Sink is Leaking?
The type of sink that is affected will have a great effect on the possible causes and fixes for the under sink plumbing leak. Essentially, it’s important to know whether the leak is under the kitchen sink or a bathroom sink. It may seem strange, but these two types of sinks work differently. This will affect how the leak is handled and why it happened in the first place.
The Bathroom sink has a straight section of pipe that extends from under the sink, and this is known as a “tail piece.” It has a rod that protrudes from the back; this is connected to the faucet with a different piece of pipe. This whole group of pipes is the sink stopper assembly; the tail piece connects to an “S” shaped pipe called a P trap. Any of these components and the connection between them could be the source of the leak.
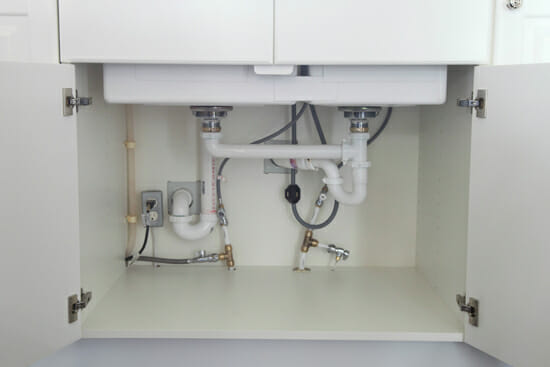
The kitchen sink doesn’t have a sink stopper assembly, but it could have a hose that’s attached above the dishwasher trap. A double kitchen sink may have two connected lines feeding into each side above the dishwasher trap. These areas are a prime location for finding annoying under sink kitchen leaks.
Step 2: Identifying the Leak
Most leaks are found on joints that are related the sinks waste water pipe. The drains on the sink are responsible for the movement of large quantities of water every day. There are many factors that could cause a leak to occur, but the initial focus should be on locating the source of the leak. Most modern homes will have white or black plastic plumbing pipes, and older homes may have chrome pipes. The leak should be easy to spot, identify the affected part and then get an exact replacement to carry out a repair. The parts must match, if they don’t, you could be making the leak worse.
Step 3: Attempting a Repair
The leak will usually be easy to find; there may be a pool of water underneath to guide you. Turning the faucet on will confirm your suspicions, and the leak will usually be located in a joint. In some cases, a simple fix may be all that’s necessary, perhaps the pipe was bumped, and it may need to be pushed gently back into place. Other more complicated issues, could be a failed washer, a broken joint or a pipe replacement. If you’re in any doubt about fixing the leak,
call a professional to carry out the repair, and this will ensure that no additional damage is caused.
By Giovanni Longo President Flood Brothers Plumbing
Giovanni Longo is a 3rd generation master plumber who has been practicing his craft and trade in the greater Los Angeles area for well over a decade and a half. A plumbing and hydraulics-engineering innovator, Giovanni’s particular world-class expertise focuses on dealing with challenging sewer system designs as well as resolving complex commercial and residential draining issues. As a certified Flood Mitigation expert, he is also well versed in a wide variety of water damage and remediation solution.