Plumbing mishaps can be some of the most frustrating and costly issues homeowners face. Whether it’s a leaky faucet, a clogged drain, or a burst pipe, having the right tools on hand can make all the difference between a quick fix and a major headache. Whether you’re a seasoned DIYer or just starting out, having a well-equipped toolbox is essential for tackling plumbing tasks around the house. In this article, we’ll explore 21 necessary plumbing tools that every DIYer should have.
Pipe Wrench
The pipe wrench is a fundamental tool in the world of plumbing. It is designed specifically for gripping and turning pipes, fittings, and other cylindrical objects with a rounded surface. The primary purpose of a pipe wrench is to tighten or loosen threaded pipes and fittings without damaging them. Here’s a detailed explanation of the components and functionality of a pipe wrench:
- Handle: The handle of a pipe wrench is typically made of sturdy material like cast iron or steel. It is long and straight, providing leverage for turning pipes with minimal effort. The handle may have a textured or knurled surface to improve grip, especially when working in wet or oily conditions.
- Jaws: At the end of the handle, there are two serrated jaws that grip onto the pipe or fitting. These jaws are designed to bite into the surface of the pipe securely, preventing slippage during use. The teeth on the jaws are angled in such a way that they dig into the pipe when pressure is applied in the turning direction, ensuring a tight grip.
- Adjustment Mechanism: Pipe wrenches typically feature an adjustable jaw that can be moved closer or further away from the fixed jaw to accommodate different pipe sizes. This adjustment mechanism is usually a knurled knob or wheel located near the base of the handle. By rotating the adjustment mechanism, the user can open or close the jaws to fit pipes of various diameters.
- Spring Mechanism: Some pipe wrenches incorporate a spring-loaded mechanism that applies pressure to keep the jaws closed when not in use. This feature helps prevent the wrench from accidentally slipping off the pipe and improves overall safety during operation.
- Swivel Head: In certain models, the head of the pipe wrench may swivel independently from the handle. This swivel head allows the wrench to be positioned at different angles relative to the pipe, providing greater flexibility and access in tight spaces.
- Replaceable Jaws: On higher-end pipe wrenches, the jaws may be replaceable to extend the tool’s lifespan. Over time, the serrated teeth on the jaws can wear down from repeated use, so being able to replace them ensures that the wrench maintains its gripping power.
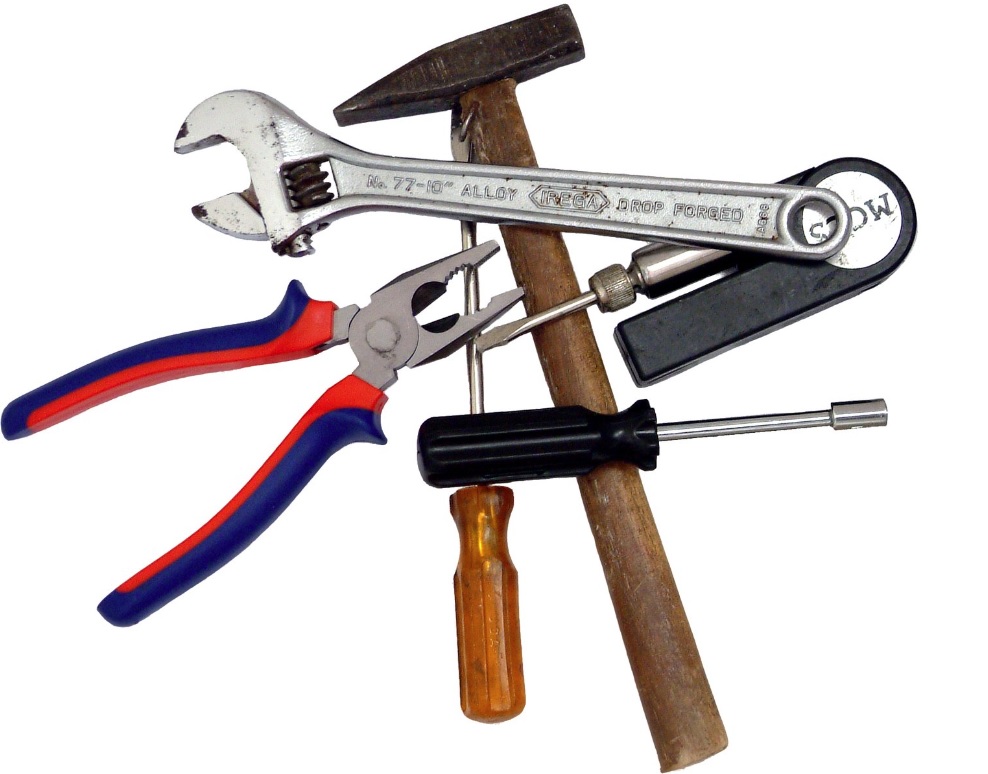
Adjustable Wrench
The adjustable wrench, also known as a crescent wrench or adjustable spanner, is a versatile tool widely used in plumbing and various other mechanical tasks. Its design features an adjustable jaw that can be widened or narrowed to fit different sizes of nuts, bolts, and fittings, making it incredibly handy for a variety of applications.
Features and Benefits
- Adjustability: The primary feature of an adjustable wrench is its ability to adapt to various sizes of fasteners. This versatility makes it suitable for a wide range of tasks where multiple wrench sizes may be needed.
- Ease of Use: Adjusting the jaw size is typically straightforward, requiring only a simple adjustment of the worm screw. This ease of use makes the adjustable wrench accessible to both professionals and DIY enthusiasts.
- Compact Design: Compared to traditional wrench sets with fixed sizes, an adjustable wrench offers a compact solution by consolidating multiple sizes into one tool. This feature is particularly advantageous in situations where space is limited or carrying multiple tools is impractical.
- Versatility: Beyond plumbing, adjustable wrenches find applications in automotive repair, construction, machinery maintenance, and more. Their versatility makes them a staple in many toolboxes.
- Non-Marring Jaws: Some adjustable wrench models feature jaws with smooth surfaces or protective coatings to prevent scratching or marring of surfaces, making them suitable for use on finished materials or delicate components.
- Durability: High-quality adjustable wrenches are typically made from hardened steel or alloy materials, ensuring durability and long-term performance even under heavy use.
Common Uses in Plumbing
- Faucet Installation and Repair: Adjusting nuts and bolts on faucets and valves during installation or repair.
- Pipe Fittings: Tightening or loosening pipe fittings, such as compression fittings or union nuts.
- Shut-off Valves: Turning shut-off valves to control water flow during maintenance or emergency repairs.
- Supply Lines: Securing nuts on supply line connections for sinks, toilets, or appliances.
- General Maintenance: Various tasks requiring the tightening or loosening of fasteners in plumbing fixtures or components.
Maintenance Tips
- Keep the adjustable wrench clean and free of debris to ensure smooth operation.
- Periodically lubricate the worm screw mechanism to prevent rust and maintain adjustability.
- Avoid using an adjustable wrench on fasteners that are already rounded or damaged, as this may cause further slippage and damage to the wrench.
- Store the adjustable wrench in a dry environment to prevent corrosion.
Plunger
The plunger is perhaps one of the most recognizable and essential plumbing tools found in any household. Its simple design and effectiveness in clearing clogs make it a must-have for tackling common plumbing issues, particularly those involving toilets and drains.
Design and Functionality
The basic design of a plunger consists of a rubber cup attached to a handle. This cup is designed to create a tight seal over the opening of a drain or toilet bowl. When the handle is pushed and pulled in a pumping motion, it creates pressure and suction within the pipe, dislodging the obstruction and allowing water to flow freely.
Types of Plungers
There are two primary types of plungers: cup plungers and flange plungers.
- Cup Plunger: This is the most common type of plunger and is typically used for clearing clogs in sinks, tubs, and showers. It features a flat rubber cup that forms a seal over the drain opening.
- Flange Plunger: Also known as a toilet plunger, this type of plunger is specifically designed for use with toilets. It has an additional flange or collar extending from the bottom of the cup, which fits into the toilet drain opening to create a better seal.
How to Use a Plunger
Using a plunger is relatively straightforward, but it’s essential to follow the correct technique to maximize its effectiveness:
- Create a Seal: Place the cup of the plunger over the drain opening, ensuring that it forms a tight seal against the surface. For toilets, insert the flange into the drain opening to create a seal.
- Apply Pressure: With a firm grip on the handle, push the plunger down gently to expel air from the cup. Then, pull up sharply to create suction. Repeat this pumping motion several times, maintaining a strong seal throughout.
- Check for Drainage: After several plunging attempts, check to see if the water begins to drain away. If the clog has been successfully cleared, water should flow freely down the drain or toilet bowl.
- Repeat if Necessary: If the clog persists, repeat the plunging process several times. For stubborn clogs, you may need to alternate between plunging and using other methods, such as a plumbing snake or drain cleaner.
Pipe Cutter
A pipe cutter is an essential tool in any plumber’s arsenal, designed to precisely cut through various types of piping materials with ease and accuracy. Whether you’re working with copper, brass, aluminum, or PVC pipes, a pipe cutter ensures clean, straight cuts without the need for excessive force or specialized skills. Let’s delve deeper into the features, types, and usage of this indispensable plumbing tool.
Types of Pipe Cutters
- Manual Pipe Cutter: Manual pipe cutters are the most common type and are operated by hand. They are available in various sizes to accommodate different pipe diameters and materials. Manual pipe cutters are versatile, portable, and suitable for both professional plumbers and DIY enthusiasts.
- Ratcheting Pipe Cutter: Ratcheting pipe cutters feature a ratcheting mechanism that allows users to make multiple rotations with minimal effort. This makes them ideal for cutting through thicker or harder pipe materials, reducing fatigue and strain on the user.
- Rotary Pipe Cutter: Rotary pipe cutters are powered by a drill or rotary tool, providing faster cutting speeds and greater efficiency, especially when working with large volumes of piping or heavy-duty materials. These cutters are ideal for professional plumbers or industrial applications.
Usage
- Marking: Before cutting the pipe, use a marker or pencil to indicate the desired cutting line. This ensures accuracy and prevents unnecessary waste.
- Adjusting the Cutter: Loosen the adjustment mechanism on the pipe cutter and position it around the pipe at the marked cutting line. Tighten the adjustment mechanism until the cutting wheel makes contact with the pipe.
- Rotating the Cutter: Begin rotating the pipe cutter around the pipe in a clockwise direction, applying steady pressure with each rotation. Continue rotating until the pipe is cut cleanly and completely.
- Deburring: After cutting the pipe, use a deburring tool to remove any burrs or rough edges from the cut end. This ensures a smooth surface for proper fitting and prevents leaks.
- Maintenance: Regularly clean and lubricate the cutting wheel and adjustment mechanism to ensure smooth operation and prolong the life of the pipe cutter. Replace the cutting wheel when it becomes dull or worn to maintain optimal cutting performance.
Hacksaw
A hacksaw is a versatile cutting tool commonly used in various applications, including plumbing. It consists of a fine-toothed blade stretched taut between two handles, typically made of metal or plastic. The blade is replaceable, allowing users to swap out dull or damaged blades for new ones. Here’s a detailed look at the features, uses, and considerations regarding hacksaws in plumbing work:
Features
- Blade: Hacksaw blades are available in different lengths and tooth counts, allowing users to select the appropriate blade for the material being cut. Blades with finer teeth are suitable for cutting metal pipes and fittings, while coarser teeth are better for cutting plastic pipes or wood.
- Tension Adjustment: Many hacksaws feature a tension adjustment mechanism that allows users to tighten or loosen the blade for optimal cutting performance. Proper blade tension is crucial for achieving clean and efficient cuts.
- Handle: The handles of a hacksaw are designed for comfort and control during use. They may have ergonomic grips or textured surfaces to provide a secure hold and reduce hand fatigue during prolonged cutting tasks.
- Frame: The frame of a hacksaw is typically made of metal, providing durability and stability during cutting operations. Some hacksaws feature adjustable frames that allow users to change the blade angle for cutting in tight spaces or awkward angles.
Uses
- Cutting Pipes: Hacksaws are commonly used in plumbing for cutting metal pipes and fittings to size. Whether installing new plumbing fixtures or making repairs, a hacksaw is essential for cutting pipes to the required length.
- Trimming Threaded Rods: In plumbing installations that involve mounting fixtures or supports, threaded rods may need to be trimmed to the desired length. A hacksaw can make quick work of cutting threaded rods to size.
- Removing Metal Burrs: After cutting metal pipes or fittings, sharp burrs may be left behind on the edges. A hacksaw can be used to remove these burrs, ensuring smooth and safe handling of the cut pieces.
- Modifying Brackets or Supports: In some plumbing projects, brackets or supports may need to be modified to fit specific requirements. A hacksaw can be used to trim or reshape these components as needed.
Teflon Tape
Teflon tape, also known as plumber’s tape or PTFE tape (polytetrafluoroethylene tape), is a versatile and essential tool in the plumbing arsenal. It consists of a thin, flexible tape made from PTFE, a synthetic fluoropolymer, which is known for its excellent chemical resistance and low friction properties. Teflon tape is commonly used to create a watertight seal on threaded pipe fittings and joints in plumbing systems. Here’s a closer look at why Teflon tape is indispensable for any plumbing project:
- Sealing Threads: The primary purpose of Teflon tape is to seal threaded pipe connections effectively. When wrapped around the male threads of a fitting before assembly, the tape fills in the gaps and creates a tight seal that prevents leaks. This is particularly important for connections carrying liquids or gases under pressure, where even a small leak can lead to significant problems over time.
- Preventing Leaks: Teflon tape acts as a barrier against leaks by providing an additional layer of protection between the threads of two mating components. It helps to prevent water, gas, or other fluids from escaping through the connection, even under high pressure conditions. This makes it an essential tool for ensuring the integrity and reliability of plumbing installations.
- Compatibility: Teflon tape is compatible with a wide range of plumbing materials, including metal (such as brass, copper, and steel) and plastic (such as PVC and CPVC). It can be safely used with both potable water systems and non-potable applications, making it suitable for a variety of plumbing projects in residential, commercial, and industrial settings.
- Easy Application: Applying Teflon tape is a straightforward process that requires minimal skill or experience. To use Teflon tape effectively, simply wrap several layers of tape clockwise around the male threads of the fitting, overlapping each layer slightly to ensure complete coverage. The tape should be snugly wrapped but not excessively tight, as this could cause it to tear or deform during assembly.
- Temperature and Chemical Resistance: Teflon tape exhibits excellent temperature and chemical resistance, making it suitable for use in demanding plumbing environments. It can withstand a wide range of temperatures, from freezing cold to extreme heat, without losing its effectiveness or integrity. Additionally, Teflon tape is resistant to most chemicals commonly found in plumbing systems, including water, oils, solvents, and acids.
- Versatility: In addition to plumbing applications, Teflon tape has various other uses in mechanical, electrical, and automotive applications. It can be used to lubricate moving parts, insulate electrical connections, and provide a barrier against corrosion and contamination. This versatility makes Teflon tape a valuable tool to have in any toolbox, whether for plumbing repairs or general maintenance tasks.
Pipe Threader
A pipe threader is an essential tool used in plumbing and pipefitting for creating threaded connections on metal pipes. These threaded connections allow pipes to be joined together securely, facilitating the assembly of plumbing systems and ensuring leak-free operation. Pipe threaders are available in manual and electric models, each offering distinct advantages depending on the scale of the project and the materials being worked with.
Manual Pipe Threader
Manual pipe threaders are handheld tools that require physical effort to operate. They typically consist of a sturdy frame with a ratcheting mechanism, a set of dies, and a handle. The dies are interchangeable and come in various sizes to accommodate different pipe diameters and thread specifications. The process of threading pipes with a manual threader involves several steps:
- Preparation: Before threading, the end of the pipe must be cleaned and deburred to ensure smooth and accurate threading. A pipe reamer or deburring tool is often used for this purpose.
- Securing the Pipe: The pipe is securely clamped or held in place using a vise or pipe wrench to prevent movement during threading.
- Die Selection: The appropriate die size and thread type are selected based on the specifications of the pipe and the fittings being used.
- Threading: The die is positioned over the end of the pipe, and the handle is turned in a clockwise direction to cut the threads into the pipe. The ratcheting mechanism ensures even and consistent threading, while the dies create precise threads that match the specifications of standard pipe fittings.
- Inspection: Once threaded, the pipe is inspected to ensure that the threads are clean, uniform, and free from defects that could compromise the integrity of the connection.
Electric Pipe Threader
Electric pipe threaders are powered tools that automate the threading process, significantly reducing the time and effort required to thread pipes manually. These machines feature a motorized drive system that rotates the dies at high speed, allowing for fast and efficient threading of large quantities of pipe. The operation of an electric pipe threader typically involves the following steps:
- Setup: The pipe is secured in place using a vise or clamping system attached to the threader. Some electric threaders feature built-in vise assemblies for added convenience.
- Die Selection: Like manual threaders, electric threaders require the selection of the appropriate die size and thread type based on the pipe and fitting specifications.
- Threading: With the pipe securely positioned, the operator activates the threader’s motorized drive system, which rotates the dies and cuts the threads into the pipe automatically. The threading process is fast and efficient, allowing for high-volume production and rapid assembly of plumbing systems.
- Inspection: Once threaded, the pipe is inspected to ensure the quality and integrity of the threads, as well as compliance with industry standards and specifications.
Basin Wrench
A basin wrench is a specialized plumbing tool designed for reaching and tightening fittings in tight spaces, particularly underneath sinks or behind toilets where conventional wrenches or pliers may not fit. Its unique design consists of a long handle with a pivoting, spring-loaded jaw at one end. This jaw can be adjusted to various angles, allowing the user to access and tighten or loosen nuts and bolts in confined areas with ease.
Uses
- Faucet Installation and Repair: Basin wrenches are commonly used for installing or repairing faucets in sinks or lavatories. They can reach up behind the sink basin to tighten or loosen the nuts securing the faucet to the countertop or sink.
- Sink Drain Assembly: When installing or replacing sink drains, basin wrenches are indispensable for tightening the fittings that secure the drain to the sink basin or the tailpiece to the drain assembly.
- Toilet Repairs: In toilet installations or repairs, basin wrenches are useful for tightening the nuts that secure the water supply line or the bolts that anchor the toilet tank to the bowl, especially in cramped spaces behind the toilet.
- Kitchen and Bathroom Fixtures: Basin wrenches can be used for various other plumbing fixtures such as angle stops, supply lines, and compression fittings found in kitchens, bathrooms, and utility rooms.
Pipe Snake or Auger
A pipe snake, also known as a drain snake or plumber’s auger, is an essential tool for clearing stubborn clogs deep within pipes. It consists of a long, flexible metal cable with a corkscrew-like auger or blade attached to one end and a handle or crank mechanism on the other. Pipe snakes come in various lengths and diameters to accommodate different pipe sizes and configurations.
Using a Pipe Snake or Auger
- Insertion: To use a pipe snake, insert the auger end into the drain or pipe until you feel resistance from the clog. It’s essential to guide the snake carefully to prevent it from getting stuck or damaging the pipes.
- Turning the Handle: Once the auger is inserted, turn the handle or crank mechanism clockwise to rotate the auger. The rotating motion helps to break up the clog and push it through the pipe.
- Advancement: As you turn the handle, gradually feed more of the snake into the pipe to continue breaking up the clog and reaching deeper into the plumbing system. It may take some time and effort to fully clear the obstruction, depending on the severity of the clog and the condition of the pipes.
- Retraction: Once you’ve cleared the clog, slowly retract the snake from the pipe while continuing to rotate the handle. Be sure to clean off any debris or residue from the auger as you remove it from the drain.
- Flushing: After using the pipe snake, flush the drain or pipe with hot water to remove any remaining debris and ensure proper drainage.
Pipe Joint Compound
Pipe joint compound, also known as pipe dope or thread sealant, is a vital material used in plumbing to create a secure and watertight seal between threaded pipe fittings. It comes in various forms, including paste, liquid, or tape, and is applied to the threads of pipes and fittings before they are screwed together. Pipe joint compound fills in the gaps between the threads, preventing water, gas, or other fluids from leaking out of the connection. There are several key features and uses of pipe joint compound:
- Sealing Properties: The primary function of pipe joint compound is to seal threaded connections to prevent leaks. It provides a tight seal even under high pressure or temperature conditions, making it suitable for a wide range of plumbing applications.
- Compatibility: Pipe joint compound is compatible with a variety of materials commonly used in plumbing, including metal, plastic, and rubber. This versatility makes it suitable for use with different types of pipes and fittings.
- Resistance to Chemicals and Solvents: Pipe joint compound is resistant to a wide range of chemicals and solvents commonly found in plumbing systems, including water, oils, fuels, and most household chemicals. This resistance ensures that the seal remains intact even when exposed to harsh substances.
- Temperature and Pressure Ratings: Pipe joint compound is designed to withstand high temperatures and pressures typically encountered in plumbing systems. It remains stable and effective over a wide range of operating conditions, ensuring long-lasting performance.
- Ease of Application: Pipe joint compound is easy to apply and requires minimal preparation. It can be applied directly to the threads of pipes and fittings using a brush, applicator, or fingers. Excess compound can be wiped away before the connection is tightened.
- Curing Time: Pipe joint compound typically cures quickly once applied to the threads, forming a durable seal within a short period. This allows for faster assembly of plumbing connections and reduces downtime during installation or repairs.
- Reusability: In some cases, pipe joint compound can be reused if the threaded connection needs to be disassembled and resealed. However, it’s essential to inspect the compound for signs of degradation or contamination before reuse to ensure proper sealing.
- Variety of Formulations: Pipe joint compound is available in various formulations to suit different applications and materials. Some compounds are specifically designed for use with potable water systems, while others are formulated for high-pressure or high-temperature applications.
Compression Sleeve Puller
A compression sleeve puller is a specialized plumbing tool designed to remove compression sleeves from pipes without causing damage. Compression fittings are commonly used in plumbing to connect pipes and fixtures, such as sinks and faucets, where a watertight seal is required. These fittings consist of three main components: a compression nut, a compression ring (also known as a ferrule or sleeve), and a compression fitting body.
Over time, compression fittings may need to be replaced due to wear and tear, leaks, or other plumbing issues. When removing a compression fitting, it’s essential to remove the compression sleeve without damaging the pipe. This is where a compression sleeve puller comes in handy. Here’s how a compression sleeve puller works:
- Identify the Compression Sleeve: Locate the compression sleeve on the pipe. It’s typically positioned over the pipe and underneath the compression nut.
- Prepare the Pipe: Before using the compression sleeve puller, ensure the pipe is clean and free of debris. Wipe down the area around the compression sleeve to provide better access.
- Position the Compression Sleeve Puller: Insert the jaws of the compression sleeve puller around the compression sleeve. The puller should grip the sleeve securely without damaging the pipe.
- Apply Pressure: With the compression sleeve puller in place, apply gentle pressure to begin loosening the compression sleeve from the pipe. Avoid using excessive force, as this could damage the pipe or surrounding fittings.
- Extract the Compression Sleeve: Slowly twist and pull the compression sleeve puller away from the pipe while maintaining pressure. The puller will gradually remove the compression sleeve from the pipe without causing damage.
- Inspect the Pipe: Once the compression sleeve has been removed, inspect the pipe for any signs of damage or corrosion. Clean the area thoroughly before installing a new compression fitting or sleeve.
Flaring Tool
A flaring tool is a specialized plumbing tool used to create flared ends on copper or aluminum tubing. These flared ends facilitate secure connections with fittings, ensuring leak-free plumbing installations. Flaring tools come in various designs and sizes to accommodate different tubing diameters and types. How to Use a Flaring Tool:
- Prepare the Tubing: Before flaring, ensure that the tubing is clean and free of any debris or burrs. Use a deburring tool to remove any sharp edges or burrs from the inside and outside of the tubing.
- Insert the Tubing: Place the tubing into the flaring tool, ensuring that the end of the tubing protrudes slightly beyond the clamping mechanism. The tubing should be seated securely in the tool to prevent slippage during the flaring process.
- Clamp the Tubing: Activate the clamping mechanism to secure the tubing in place. Ensure that the tubing is held firmly and evenly to prevent misalignment or shifting during flaring.
- Position the Flaring Cone: Position the flaring cone at the end of the tubing, ensuring that it is cantered and aligned with the tubing’s axis. The cone should make contact with the tubing surface without excessive force.
- Apply Pressure: Using the handle or lever, apply steady pressure to the flaring cone, gradually forcing it into the end of the tubing. Continue applying pressure until the desired flare size and shape are achieved.
- Check the Flare: Once the flaring process is complete, carefully inspect the flare to ensure that it is uniform and free of defects. The flare should have a smooth, consistent shape with no cracks or irregularities.
- Remove the Tubing: Release the clamping mechanism and remove the flared tubing from the flaring tool. Inspect the flare once again to ensure its integrity before proceeding with installation.
Faucet Key
A faucet key is a specialized tool designed to operate outdoor faucets, also known as sillcocks or hose Bibbs, typically found on the exterior walls of homes or buildings. These faucets are commonly used for connecting garden hoses, watering outdoor plants, or washing vehicles.
The design of outdoor faucets often includes a long stem with a valve at the end, which is operated by turning a handle or wheel. However, unlike indoor faucets, outdoor faucets often feature a unique shape or configuration that requires a specific tool to turn the valve on or off. This is where the faucet key comes into play.
A faucet key typically consists of a T-shaped handle with a protruding square or hexagonal tip at the end. This tip is specially designed to fit into the recessed or recessed square or hexagonal opening of outdoor faucet valves. By inserting the faucet key into the valve opening and turning it clockwise or counter clockwise, you can easily control the flow of water from the outdoor faucet. The use of a faucet key offers several advantages:
- Accessibility: Outdoor faucet valves are often recessed or located in tight spaces, making them difficult to reach with conventional tools. The faucet key’s compact design allows for easy access to these valves, even in confined areas.
- Precision: The square or hexagonal tip of the faucet key provides a secure grip on the valve, allowing for precise control of water flow. This prevents over-tightening or damaging the valve, ensuring smooth operation and longevity.
- Versatility: Faucet keys come in various sizes and configurations to accommodate different types of outdoor faucet valves. Whether you’re dealing with a standard sillcock, a frost-free faucet, or a specialty valve, there’s a faucet key designed to fit your needs.
- Durability: Faucet keys are typically made of durable materials such as steel or hardened plastic, ensuring long-lasting performance even under tough conditions. This makes them a reliable tool for outdoor maintenance tasks year after year.
Pipe Bender
A pipe bender is an essential tool in the arsenal of any plumber or DIY enthusiast working with metal piping systems, particularly copper tubing. This versatile tool is designed to shape pipes into smooth, precise bends without kinking or collapsing the tubing, allowing for the creation of custom bends to fit specific plumbing configurations.
How it Works
Pipe benders typically consist of a sturdy frame with a bending mechanism, which may include rollers, guides, and a lever or handle for applying force. The pipe to be bent is inserted into the bender and positioned according to the desired bend radius and angle. The operator then applies gradual pressure using the lever or handle, causing the pipe to bend smoothly around the bending form or die.
Types of Pipe Benders
There are several types of pipe benders available, each suited to different pipe diameters and bending requirements:
- Manual Pipe Bender: Manual pipe benders are operated by hand and are suitable for light to moderate bending tasks. They are compact, portable, and easy to use, making them ideal for small-scale plumbing projects or on-site repairs.
- Hydraulic Pipe Bender: Hydraulic pipe benders utilize hydraulic pressure to bend pipes with greater force and precision. These benders are capable of bending thicker-walled pipes and are commonly used in industrial settings or for heavy-duty plumbing installations.
- Electric Pipe Bender: Electric pipe benders are powered by electricity and feature motorized bending mechanisms for increased efficiency and consistency. These benders are suitable for high-volume bending tasks and offer precise control over bend angles and radii.
Pressure Gauge
A pressure gauge is an indispensable tool in plumbing, providing essential information about the pressure within a plumbing system. It’s a device used to measure the pressure of liquids or gases within pipes, tanks, or other vessels. In plumbing, pressure gauges are commonly used to monitor water pressure in residential, commercial, and industrial plumbing systems. Here’s a closer look at the importance of pressure gauges in plumbing:
- Monitoring Water Pressure: One of the primary functions of a pressure gauge in plumbing is to monitor water pressure. Proper water pressure is crucial for the efficient operation of plumbing fixtures and appliances. Too low of pressure can result in slow flow rates and ineffective performance, while excessively high pressure can lead to damage to pipes, fixtures, and appliances.
- Detecting Issues: Pressure gauges can help detect issues within a plumbing system. Sudden fluctuations or drops in pressure may indicate leaks, blockages, or other problems that require attention. By monitoring pressure regularly, homeowners and plumbers can identify issues early on and take corrective action before they escalate into larger problems.
- Testing for Leaks: Pressure gauges are often used in leak detection processes. By pressurizing a plumbing system and monitoring the pressure over time, it’s possible to identify leaks based on pressure drops. This can be especially useful for locating hidden leaks within walls, floors, or underground pipes.
- Adjusting Pressure Regulators: Many plumbing systems are equipped with pressure regulators to maintain consistent water pressure throughout the system. Pressure gauges are used to adjust these regulators to ensure that water pressure remains within the desired range. This is particularly important in areas where water pressure from the municipal supply fluctuates frequently.
- Ensuring Safety: In certain plumbing applications, such as gas lines or industrial systems, pressure gauges play a critical role in ensuring safety. They provide real-time information about pressure levels, allowing operators to take preventive measures or shut down systems in the event of unsafe conditions.
Types of Pressure Gauges
- Analog Gauges: Traditional pressure gauges with a dial display and a needle pointer are commonly used in residential and commercial plumbing applications. They provide a visual representation of pressure levels and are relatively simple to install and use.
- Digital Gauges: Digital pressure gauges offer precise and accurate readings displayed on a digital screen. They may include additional features such as data logging, alarms, and customizable settings. Digital gauges are often preferred in industrial settings or for applications where precise pressure measurements are required.
- Differential Pressure Gauges: These gauges measure the difference in pressure between two points in a system. They are commonly used in HVAC systems, filtration systems, and fluid flow monitoring applications.
- Compound Gauges: Compound gauges measure both positive and negative pressures. They are commonly used in systems where pressure may fluctuate above and below atmospheric pressure, such as vacuum systems or compressed air systems.
Tube Cutter
tube cutter is a vital tool in any plumber’s arsenal, particularly when working with thin-walled tubing like copper or aluminum. Its primary function is to make clean, precise cuts in tubing, ensuring that pipes fit together snugly and securely without leaks or uneven edges. Here’s a closer look at the tube cutter and its importance in plumbing tasks:
- Functionality: Tube cutters are designed to cut through tubing cleanly and smoothly, leaving behind a neat edge. They typically feature a sharp cutting wheel that rotates around the circumference of the tubing, gradually scoring and slicing through the material as the tool is turned.
- Types of Tubing: Tube cutters are versatile tools that can handle various types of tubing, including copper, aluminum, brass, and thin-wall plastic. They come in different sizes to accommodate different diameters of tubing, ensuring a precise fit for each application.
- Clean Cuts: One of the main advantages of using a tube cutter is its ability to make clean cuts without deforming or distorting the tubing. This is essential for ensuring proper fittings and connections, as rough or uneven edges can lead to leaks or weak joints.
- Ease of Use: Tube cutters are relatively simple to use, making them suitable for both professional plumbers and DIY enthusiasts. To make a cut, the tubing is inserted into the cutter, and the cutting wheel is tightened gradually while rotating the tool around the tubing. This process creates a clean, even cut with minimal effort.
- Portability: Tube cutters are typically compact and lightweight, making them easy to transport and use in various plumbing projects. Their portability makes them ideal for on-site repairs or installations where space may be limited.
Deburring Tool
A deburring tool is a specialized tool used in plumbing and metalworking to remove burrs, sharp edges, and rough spots from the cut ends of pipes, tubes, or other materials after they have been cut or machined. These burrs and rough edges can result from various cutting methods such as sawing, drilling, or machining, and if left unaddressed, they can lead to issues such as leaks, improper fittings, or injuries to individuals handling the materials. Using a deburring tool is a straightforward process:
- Identify the area of the pipe or tube that requires deburring. This is typically the cut end where burrs and rough edges are present.
- Hold the deburring tool securely, ensuring a firm grip on the handle.
- Position the cutting head of the deburring tool against the edge of the pipe or tube at a slight angle.
- Apply gentle pressure and rotate the deburring tool around the circumference of the pipe or tube. The cutting edges will gradually shave away the burrs and rough spots, leaving behind a smooth, clean edge.
- Continue rotating the deburring tool until the entire circumference of the pipe or tube has been deburred.
- After deburring, visually inspect the edge to ensure that all burrs and rough spots have been removed. Run a finger along the edge to feel for any remaining imperfections.
- Once satisfied with the deburring process, the pipe or tube is ready for further assembly, such as fitting connections or joining with other components.
Pipe Reamer
A pipe reamer is a specialized tool used in plumbing and pipefitting to smooth and remove burrs and rough edges from the inside of pipes. This tool is particularly essential when working with plastic pipes, such as PVC or CPVC, where cutting can leave jagged or uneven edges that may interfere with proper fittings or cause leaks over time. Using a pipe reamer is straightforward but requires care and precision to achieve optimal results. Here’s a basic overview of how to use a pipe reamer effectively:
- Select the appropriate size of the pipe reamer for the diameter of the pipe you’re working with. Pipe reamers come in various sizes to accommodate different pipe dimensions.
- Insert the pipe reamer into the end of the pipe that needs to be reamed. Make sure the tool is centered and aligned with the inner surface of the pipe.
- Apply gentle pressure and rotate the pipe reamer clockwise while maintaining a consistent motion. The cutting edges or abrasive surfaces will gradually remove any burrs or rough spots inside the pipe.
- Continue reaming the pipe until you achieve a smooth and uniform bore throughout the entire length of the pipe. Take care not to apply too much force, as this could damage the pipe or the reamer.
- Once the reaming process is complete, inspect the inner surface of the pipe to ensure that all burrs and irregularities have been removed. Run your fingers along the inside of the pipe to feel for any rough spots.
- Clean the pipe thoroughly to remove any debris or shavings generated during the reaming process. This will help prevent contamination of the plumbing system and ensure a clean installation.
Pipe Inspection Camera
A pipe inspection camera, also known as a sewer camera or drain camera, is a sophisticated tool used in plumbing diagnostics and maintenance. It consists of a small, waterproof camera attached to a long, flexible cable. The camera is designed to navigate through pipes and plumbing systems, capturing high-definition video footage and images of the interior surfaces.
Applications of Pipe Inspection Cameras
- Diagnosing Drain and Sewer Issues: Pipe inspection cameras are commonly used to diagnose a wide range of drain and sewer problems, including clogs, blockages, root intrusion, pipe corrosion, and structural damage. By visually inspecting the interior of the pipes, plumbers can accurately assess the condition of the plumbing system and recommend appropriate repairs or maintenance procedures.
- Pre-Purchase Home Inspections: Before purchasing a new home, prospective buyers often use pipe inspection cameras to assess the condition of the plumbing system. This allows them to identify any existing issues or potential problems, such as damaged or deteriorating pipes, before finalizing the purchase.
- Routine Maintenance: Regular inspections with pipe inspection cameras can help homeowners and property managers identify and address minor issues before they escalate into major plumbing emergencies. By proactively detecting leaks, blockages, or deterioration in pipes, preventive maintenance can extend the lifespan of the plumbing system and prevent costly repairs down the line.
- Municipal Sewer Inspections: In addition to residential applications, pipe inspection cameras are commonly used by municipalities and utility companies to inspect and maintain public sewer systems. These cameras can navigate through large-diameter sewer mains, identifying blockages, structural defects, and other issues that may impact the flow and functionality of the sewer network.
Pipe Locator
A pipe locator, also known as a pipe and cable locator or underground pipe locator, is a specialized tool used to accurately identify the location of buried pipes, cables, and other underground utilities. It is an essential device for plumbers, utility workers, contractors, and DIY enthusiasts involved in excavation, construction, or repair projects that require working near or around underground infrastructure. Here’s how a pipe locator typically works:
- Electromagnetic Induction: Many pipe locators operate based on the principle of electromagnetic induction. These devices emit a low-frequency electromagnetic signal through a transmitter unit connected to one end of the pipe or cable being traced.
- Reception with Receiver: A receiver unit, held by the user, detects the electromagnetic signal transmitted by the transmitter. As the receiver moves over the ground surface, it picks up the signal’s strength and direction, allowing the user to trace the path of the buried pipe or cable.
- Signal Strength and Depth Detection: The receiver displays the strength of the signal, indicating the proximity to the buried utility. Additionally, some advanced models can estimate the depth of the pipe or cable based on signal characteristics and user input.
- Audio and Visual Feedback: Pipe locators often provide audio and visual feedback to assist users in locating buried utilities. Audible tones or beeps increase in frequency or intensity as the receiver gets closer to the target, while visual indicators, such as LED lights or a digital display, provide additional guidance.
- Ground Conditions and Interference: It’s important to note that the accuracy and effectiveness of a pipe locator can be affected by various factors, including soil composition, electromagnetic interference from nearby structures or utilities, and the presence of metallic objects in the vicinity.
- Mapping and Marking: Once the buried utility’s location has been identified, the user can mark the ground surface using spray paint, flags, or other markers to indicate the utility’s path. This information is crucial for avoiding accidental damage during excavation or construction activities.
- Multiple Frequency Options: Some pipe locators offer multiple frequency options to accommodate different types of pipes and cables, such as metallic or non-metallic materials. Users can adjust the frequency settings to optimize detection accuracy based on the specific characteristics of the buried utility.
- Accessories and Features: Depending on the model, pipe locators may come with various accessories and features, such as additional probes, GPS integration for mapping and documentation, data logging capabilities, and ruggedized construction for durability in outdoor environments.
Pipe Clamps and Supports
Pipe clamps and supports play a crucial role in ensuring the stability and integrity of plumbing systems. These components are designed to secure pipes in place, preventing sagging, movement, or damage caused by vibration, thermal expansion, or other external forces. Here’s a closer look at pipe clamps and supports and their importance in plumbing installations:
- Stability and Support: Pipe clamps and supports provide essential stability and support for pipes, ensuring they remain securely in place. This is particularly important in applications where pipes are suspended overhead or run along walls or ceilings.
- Preventing Sagging: Over time, pipes can sag or droop under the weight of water, especially in horizontal runs. Pipe clamps and supports help to counteract this sagging, maintaining the proper slope for efficient drainage and preventing strain on the pipes.
- Preventing Movement: Vibrations from nearby machinery, thermal expansion and contraction, or even building settling can cause pipes to shift or move out of alignment. Pipe clamps and supports anchor pipes firmly in place, minimizing movement and reducing the risk of damage or failure.
- Minimizing Noise and Vibration: Loose or unsupported pipes can create noise and vibration as water flows through them. By securing pipes with clamps and supports, these vibrations are dampened, resulting in quieter operation and a more comfortable living environment.
- Protection Against Damage: Pipes that are left unsupported are more vulnerable to damage from accidental impacts or external forces. Pipe clamps and supports help to protect pipes from being knocked or bumped, reducing the risk of leaks, cracks, or other issues.
- Compliance with Building Codes: Many building codes and regulations require the use of pipe clamps and supports to ensure the safety and reliability of plumbing systems. Properly installed clamps and supports help to meet these requirements, ensuring compliance with local codes and standards.
Having the right tools is essential for tackling plumbing projects effectively and efficiently. Whether you’re a DIY enthusiast or thinking about becoming a professional plumber, investing in a comprehensive set of plumbing tools will save you time, money, and frustration in the long run. By equipping yourself with these 21 necessary plumbing tools, you’ll be well-prepared to handle a wide range of plumbing tasks around the house with confidence and ease. But remember, always contact your local professional plumbers for any major plumbing repairs.